The Injector Project, aka the riskiest thing I’ve ever done.
Posted on April 23, 2023
There we were, two years into vanlifing. We’d just returned home, a 40-hour trek from the Mexican border to the Canadian. And now, the truck was making oil.
At first I was in denial. I would squint hard at the oil level on the dipstick, so hard I’d blur my eyes. You could hear my thoughts: “Nah, that looks about the same” … “we’re just parked on a slope” … “maybe I saw it wrong last time” …
The LB7 Duramax is a solid engine. It was GM’s first in what would become a reputable line of diesels. But the LB7 has a curse: the injectors go bad.
Buried beneath a bed of snakes and a pair of valve covers, the LB7’s injectors have a penchant for cracking and leaking diesel into the crankcase. Then, diesel fuel mixes with viscous motor oil. As you can imagine, running an engine with diluted oil causes premature wear – and eventual catastrophic failure.
Because you need to remove so many components to even get to the injectors, the repair cost often runs north of $5,000. The majority of this cost is for (tedious) labor.
I didn’t want to pay $150 an hour for tedious labor.
There’s a forum called duramaxforum.com. I first brushed with it when our fuel filter assembly cracked and left us stranded in a parking lot. I didn’t realize then how powerful that forum is.
You can replace your own injectors, he responded. The only response on a thread I started called “LB7 injector swap – most common mistakes”. He continued: A few sockets, wrenches, and some Allen sockets. Take your time and just do it step by step.
My dad always told me that there were two things he didn’t like: electrical and automotive. And he always told me that I’ve got his genes. Injectors are the most complicated and precise part of the engine, my dad’s diesel mechanic warned. Replacing the injectors is risky – there’s a lot that can go wrong on the way down if you don’t know what you’re doing. I didn’t know what I was doing – and I was doing it in my girlfriend’s dad’s workshop.
“Shit!” I yelled as coolant splashed onto the floor. I shifted the bucket with my foot, grabbing a towel to try and soak up the orange fluid before it stained. Draining the coolant is a simple preliminary step. I looked up at Sonoma. “We’ll deep clean the floor after we drive the truck out of here.”
I started with the passenger side – the easier side. There’s less in the way. I learned the names of the parts as I took them off – air intake, intercooler tubes, fuel injector control module (FICM), PCV hose, glow plug wiring. After a few afternoons of shaky but smooth wrenching, I was down to the valve covers.
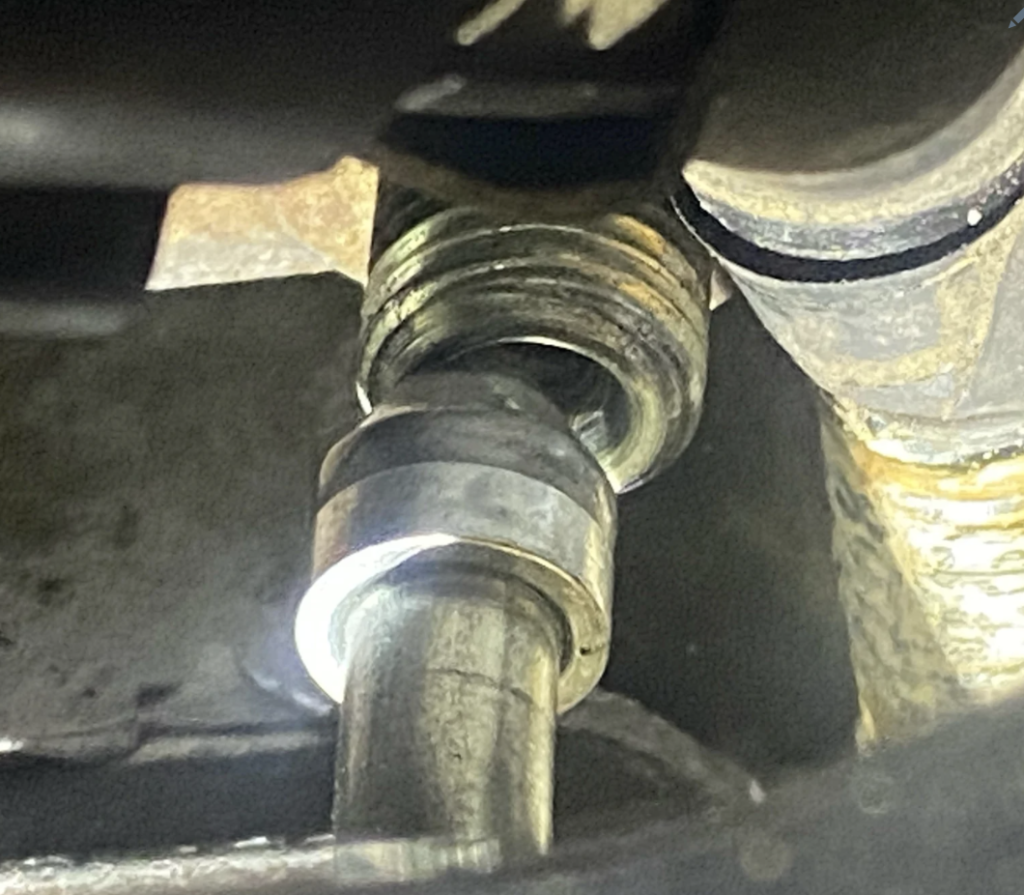
The high-pressure fuel lines came out relatively easy. I shone a flashlight into the holes in the valve cover. The injectors were disgusting – full of rust. I knew this must be the root cause of our issue.
Prying off the upper valve cover with a crowbar revealed the injectors. I felt like I was looking into an exposed brain. The injector wiring harnesses and lower valve cover came off easy, and suddenly, I found myself pulling the injectors themselves.

The first three injectors came out fine. The fourth was the issue.
Over time, the copper washer that sits between the injector and the cylinder can fail. When it does, combustion gases and soot blow between the injector and the injector cup, fusing them together. When this happens, you often end up pulling out the injector and the cup – instead of just the injector.
It took me three days to get that injector out. I tried every trick in the book (on the internet). I was so frustrated with it, I made up a song.
I finally popped it loose with a ratchet strap I hooked to a nearby piece of equipment (Sonoma’s idea). Issue is, the cup came with it – now, I’d have to replace the cup…
Some people pull all of the cups and reseal them when they do their injectors. Others say that “if it ain’t broke, don’t fix it.” I was hoping to not have to figure out how to reinstall a cup. After days of fighting the injector, I had an entirely new challenge in front of me – a challenge I hadn’t prepared for.
A nearby O’Reilly’s happened to have one cup in stock – bingo! Shortly after acquiring it, I failed my first installation attempt. I used spray silicone lubricant on the cup’s two o-rings and I couldn’t get it entirely seated before it seized.
I express shipped a specialized “cup-puller tool” to a nearby amazon locker and proceeded to scratch the cup on extraction. Luckily, a nearby Autozone also had a singular cup in stock. I used my learnings from the first cup to correctly install the second cup.
Then, I finally started reassembly. After installing the valve covers and torquing the bolts, I started to hook up my new (shiny) high-pressure fuel lines. However, the fuel line for the #1 injector (the one for which I reinstalled the cup)… just… didn’t… fit. I couldn’t get it to work. I googled frantically – had anyone else experienced this? does this mean I did the cup wrong? is the injector not torqued down correctly? is it off center somehow? Unfortunately, I found nothing.
~ Winter Intermission ~ Oh yeah! I then went home to Wisconsin for three weeks. I’d spent nearly that long on just half the project, which I’d aimed to have completely finished before I left. And now, upon my return, I’d have to tear the passenger side back apart and see if I could fix what I messed up.
Over the intermission, I consulted with Lincoln Diesel Specialties (the suppliers of my injector kit) to glean insights into my problem. They helped me determine what could be causing my misalignment issue and suggested an action plan. When I was finally back in Washington, I tore back into the passenger side and implemented their suggestion. Thankfully, the second time was the charm, and the passenger side was shortly complete.
Driver’s side – time to do it all over again, but with more stuff in the way! Also, you’re a month behind schedule!
Fortunately, the unique issues I encountered on the driver’s side were more common. Because the midwest’s road salt obsession typically ends up in the gutter, the driver’s side rusts faster than the passenger’s. In other words, I stripped an Allen head valve cover bolt because it was more rust than bolt.

Allen head bolts are a horrible design
With the purchase of a Dremel drill to grind the bolt’s head off, I was on my way. All four injectors came out relatively smoothly, and there were no nebulous problems. In fact, the only real issue after the stripped Allen bolt was that I mindlessly forgot to remove the caps on the injector inlets before replacing the upper valve cover. A few hectic minutes of sealant cleaning and re-applying solved that issue.
After fully reassembling the driver’s side, I refilled the coolant, primed the fuel filter bulb, then cranked the engine for a full 10 seconds before it started up. A miracle – it actually worked!
Unfortunately, after driving it for a week, the engine was still making oil – and at a more rapid pace than before. I took it to a mechanic and had them (expensively) double check my injector work. Despite this, the issue was still not resolved.
Further diagnosis by Duvall’s best diesel mechanics revealed that the back seal on the truck’s fuel injection pump was leaking fuel into the crankcase – despite their disgusting appearance, the injectors may not have even been bad in the first place. A couple thousand more dollars for a new CP3 and the problem was finally fixed!
Here’s the playlist I listened to during the project:
I also listened to this album about a thousand times:
I also made a cheesy LinkedIn post version of this story – it even has key takeaways!!!
I used to be able to find good info from your blog posts.